To process an image or multiple images, first go to Products > Image Processing in the IRP Admin left navigation menu, then follow the steps in each of the following sections.
Note: The environment is configured for eight simultaneous uploads, with a total size limit of approx, 40 MB. If you try to upload too much at any one time, the process will fail.
Upload Images section
First you need to upload the images that you want to process. To do so, proceed as follows:
- Click the Browse button.
- Select the image or images that you want to process from your machine. Once uploaded, these images can be processed using the Image Processor. Brand images and Model images can be uploaded in bulk (instead of individually) using the individual edit pages. For images to be assigned to a particular element, they must follow the image naming convention of ID-INDEX.FORMAT. For example, for a Model with ID of 1, the images should be named as follows:
1.jpg, 1-1.jpg, 1-2.jpg, 1-3.jpg … 1-x.jpg
Note that Brands can have only one Logo Image uploaded against them; therefore indexing Brand Logo Images will not work.
- Click the Upload Images button to upload the images to the New Images folder.
After you have uploaded your images you can process them using either the ‘Smart Image Resizer ’ feature or you can process them manually. These methods are described in the sections that follow.
Smart Image Resizer section
The Smart Image Resizer section appears as follows:
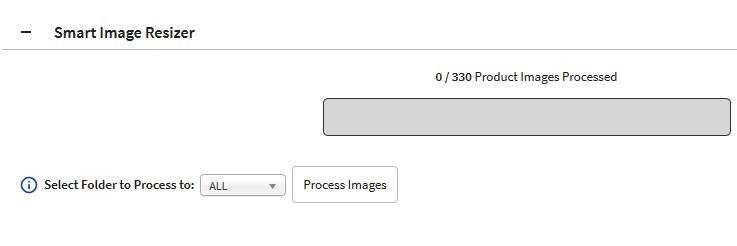
- Select the appropriate folder from the Select Folder to Process to drop-down list or select All, then click the Process Images button.
The Smart Image Resizer then loops through images in the Images/Models/New/ folder, resizing them according to the following Application Setting values:
- Model Images Width For Larger Image: This is the maximum Width (in pixels) of the Model image displayed on the Large Image popup or Image Zoom functionality. Images are automatically resized when you upload them in bulk or through the Model Edit page. Note that, the larger the image, the longer it will take to download when a customer visits the relevant page.
- Model Images Width For Models Page Image: This is the maximum Width (in pixels) of the Model image displayed on the List View style used on the Models page. Images are automatically resized when you upload them in bulk or through the Model Edit page. Note that, the larger the image, the longer it will take to download when a customer visits the relevant page.
- Model Images Width For Home Page Image: This is the maximum Width (in pixels) of the Model image displayed on your home page and, if used, Gallery View Product Listing style. Images are automatically resized when you upload them in bulk or through the Model Edit page. Note that, the larger the image, the longer it will take to download when a customer visits the relevant page.
- Model Images Width For Listing Image: This is the maximum Width (in pixels) of the Model image displayed on the List View style used on Product Listing pages. Images are automatically resized when you upload them in bulk or through the Model Edit page. Note that, the larger the image, the longer it will take to download when a customer visits the relevant page.
- Model Images Width For Thumbnail Image: This is the maximum Width (in pixels)of the Model image displayed on the carousel used on the Models page. Images are automatically resized when you upload them in bulk or through the Model Edit page. Note that, the larger the image, the longer it will take to download when a customer visits the relevant page.
- Model Images Quality For Larger And Models Page Images: This is the Jpeg image Quality (%) of images used on the Models page and for the Zoom functionality. Note that, the higher the Quality, the larger the file size, although since these images are slightly smaller, you can use a higher quality than in the larger images.
- Model Images Quality For Home Page And Listing Images: This is the Jpeg image Quality (%) of images used on the Homepage and Product Listing pages. Note that, the higher the Quality, the larger the file size, although since these images are slightly smaller, you can use a higher quality than in the larger images.
- Model Images Quality For Thumbnail Images: This is the Jpeg image Quality (%) of images used on the Thumbnail Images (used in the Models page Image carousel). Note that, the higher the Quality, the larger the file size, although since these images are slightly smaller, you can use a higher quality than in the larger images.
This action is performed asynchronously so as not to disrupt any other operations being performed via the IRP.
Process Images Manually section
- Select the Target Folder from the drop-down list (All, Original, Full, 150). Selecting the Target Folder will also set the Process settings including the Target Directory for saving, Image Quality and Resize values, based on the associated Application Setting values.
- From this point you can enter or edit the following details:
| Setting | Description |
|---|
| Files To Be Processed |
| Target Directory |
If you plan to use a different folder for storing the images, you can change the Target Folder. The standard Target Folders will be selected by default and should be left as such, unless a change is required. |
| Output Options |
| Overwrite Existing Files |
If this option is enabled, any files containing the same filename will be overwritten. |
| Output Format |
Sets the format of the output image:
|
| Jpeg Quality |
Sets the Image Quality as defined by the values stored in the following Application Settings:
- Model Images Quality For Home Page And Listing Images: This is the Jpeg image Quality (%) of images used on the Homepage and Product Listing pages. Note that, the higher the Quality, the larger the file size, although since these images are slightly smaller, you can use a higher quality than in the larger images.
- Model Images Quality For Larger And Models Page Images: This is the Jpeg image Quality (%) of images used on the Models page and for the Zoom functionality. Note that, the higher the Quality, the larger the file size, although since these images are slightly smaller, you can use a higher quality than in the larger images.
- Model Images Quality For Thumbnail Images: This is the Jpeg image Quality (%) of images used on the Thumbnail Images (used in the Models page Image carousel). Note that, the higher the Quality, the larger the file size, although since these images are slightly smaller, you can use a higher quality than in the larger images.
|
| Use Place Identifier |
This displays the Place Identifier and Place Identifier Text details for use. |
| Place Identifier |
Select whether to put the identifier at the beginning of the filename or at the end of the filename. |
| Place Identifier Text |
Select whether you want to add Text or the current Date in the location specified in the Place Identifier setting.
For example, if you have selected to place a Text identifier of ‘ModelImage’ before the filename, the resulting filename will be ‘ModelImageOriginalFilename.jpg’.
If you have selected to place a Date identifier after the filename, the resulting filename will be ‘OriginalFilename17102013.jpg’. |
| Processing Options |
| Resize Option |
You can select one of the following Resize Options:
- Smart Resize: Depending on the Target Folder selection choice, this sets the Image Size values as defined by the values stored in the following Application Settings:
| Application Setting |
|---|
| Model Images Width For Larger Image: This is the maximum Width (in pixels) of the Model image displayed on the Large Image popup or Image Zoom functionality. Images are automatically resized when you upload them in bulk or through the Model Edit page. Note that, the larger the image, the longer it will take to download when a customer visits the relevant page. |
| Model Images Width For Models Page Image: This is the maximum Width (in pixels) of the Model image displayed on the List View style used on the Models page. Images are automatically resized when you upload them in bulk or through the Model Edit page. Note that, the larger the image, the longer it will take to download when a customer visits the relevant page. |
| Model Images Width For Home Page Image: This is the maximum Width (in pixels) of the Model image displayed on your home page and, if used, Gallery View Product Listing style. Images are automatically resized when you upload them in bulk or through the Model Edit page. Note that, the larger the image, the longer it will take to download when a customer visits the relevant page. |
| Model Images Width For Listing Image: This is the maximum Width (in pixels) of the Model image displayed on the List View style used on Product Listing pages. Images are automatically resized when you upload them in bulk or through the Model Edit page. Note that, the larger the image, the longer it will take to download when a customer visits the relevant page. |
| Model Images Width For Thumbnail Image: This is the maximum Width (in pixels)of the Model image displayed on the carousel used on the Models page. Images are automatically resized when you upload them in bulk or through the Model Edit page. Note that, the larger the image, the longer it will take to download when a customer visits the relevant page. |
- Force Resize: This forces the resized images’ Width and Height values to the set values.
- Ratio Resize: This applies the resize based on a Scale Factor as follows:
Scale Factor = Entered Width Value / Starting Image Width Value
For example:
- If the starting image has a width value of 800 and you enter a value of 1600, the resulting images will be twice the size of the originals:
1600 / 800 = 2
- If the starting image has a width value of 800 and you enter a value of 400, the resulting images will be half the size of the originals:
400 / 800 = 0.5
- Percentage Resize: This resizes the images based on the percentage value set.
|
- When you have entered or edited the details, you have two options:
- Copy Images from New to Target This will copy the images that have been uploaded to the New Image folder to the Target Folder without applying the Output or Processing Options.
- Create Images with Resizing This will create the images that have been uploaded to the New Image folder in the Target Folder, applying the set Output or Processing Options.
Bulk Image Operations section
The final section includes several options for updating images in bulk:
- Update Model Images Created Within The Last [X] Days: Clicking this button sets the appropriate count of images against a Model to ensure that no broken images appear on the front end of the website.
- Update Original Images Created Within The Last [X] Days With Width (px) greater than [X] pixels or Height (px) greater than [X]: Clicking this button updates the original images uploaded against a Model.
- Update Enhanced Images Created Within The Last [X] Days: Clicking this button causes the IRP to search for Enhanced Images uploaded for a Model. If an Enhanced Image is found, it sets the Enhanced Image property against the Model to true, ensuring that the image will appear.
- Update Models With No Images: Clicking this button causes the IRP to search for Model images and if it does not find any for a given Model, it sets the Image field against the Model to false. This will ensure that a generic image will appear against the Model rather than a broken image.
- Process Stock Images into Model Images: Clicking this button will convert any stock-specific images into Model images and add image-to-stock relationship links. Note: You should click this button only when moving from the old stock images functionality to the current drag-and-drop functionality. Clicking this button multiple times may create duplicate product images.
- Remove Image No Longer Assigned To Models : Use this button to remove any extra images you have for your models. For example, you may now only have two images for a model, which will be named something like ModelID.jpg and ModelID-1.jpg. You may for some reason have ModelID-2.jpg, ModelID-3.jpg, and so on, in the file system. This button will clean off those old images off and will keep your file system usage to a minimum for your Model images. Only click this button if this is a particular problem. If in any doubts, please contact your IRP Account Manager.
https://www.irpcommerce.com///IRPSupport/Image-Processing/kb-21.aspx?HowTo=203#HowToGuide203
When the IRP serves an image or other static file, it adds two headers:
etag – this is a hash of the file contents, meaning that if the file is changed, the etag will be different.last-modified – this simply means what it says.
The second time that a browser requests this image, it will send a request for the file and include the last etag and/or last-modified value it has for it. The server will check if these are different to the versions it has, and then:
- If they are different, it will return the file contents.
- If they are not different, it will return a '304 Not Modified' response. This response tells the browser that it can use the file it has saved locally, and there is no need to download it in full again.
The advantage of this is that you reduce the amount of bandwidth required, whilst also making sure any change in your content is served immediately.
Cache policy
Google's recommendation of a cache policy comes from the fact that, despite not downloading any additional content, it still has to make a request to the server to check if the file has been changed, which on the very worst mobile connections, may well be a hinderance. But for most, on 3G+ or WiFi, these requests are generally imperceptible to a user.
Setting a cache policy, whereby images are cached on a user's local machine for a period of time, stops the browser even requesting the file, and so satisfies Google's recommendation.
However, because they do not even request the file, they are never made aware if there are any changes to it. So if you change your content frequently, this can cause huge issues unless you are extremely careful and diligent in making sure that any 'new' content is served with brand new file paths.
For example, if you change a banner image for ID 123, it will not be re-downloaded by anyone who has downloaded that image within the cache period. You would have to create a brand new banner, which generates a new ID, and therefore a new file name.
In general, everything can be managed with diligence, except model imagery. The model ID is fixed and therefore so are the image file names. Therefore, if you are implementing a cache policy on model images, it is vital that your imagery is correct and not going to change before the model goes live.
Summary
For the vast majority of modern users, etag and last-modified are effective at managing your static content. The trade off is between small requests having to be sent and handled, and making sure any updated content is served straightaway.
If your content very rarely changes, or you make sure any updates are actually served as 'new' content, then a static cache policy may well be more beneficial.
https://www.irpcommerce.com///IRPSupport/Image-Processing/kb-21.aspx?HowTo=401#HowToGuide401
