There are several steps involved in adding new Home Pages. There are some straightforward, generic initial configuration steps followed by specific steps for the type of Home Page you want to create – Criteria, Product or Static. All steps are described in the sections that follow.
Initial configuration steps
- Go to Interface & Design > Home Page Content in the IRP Admin left navigation menu.
- Use the Display Settings drop-down menu at the top of the page to make sure that the areas you want to work with are enabled.
- Use the Search filter to find the country that you want to create a Home Page for (if you want the Home Page to show for more than one country you can do this easily later in the configuration process, as described below).
- If no user-generated content has ever been configured for the country, then you will see only the default, system-generated areas in the main grid, for example:
- Click the Edit button. The Home Page Content Management tab will open.
- The left tab will show system-generated content. Click the Configure Content tab to proceed:
- You can now choose whether to create new content or to copy content from another country. If you want to copy content, simply select the country you want to copy and then click the Copy Content button. This will immediately populate the country's Home Page with the content from the other Home Page.
- If you don't want to copy from another country, click the Create New Content button. The first thing that happens is that Default Best Sellers will be created for the country. You can edit this by clicking the 'cogwheel' on the tab and selecting one of the options:
For more details, see How to Edit a Home Page later in this section.
- To create new content, click the large green plus symbol. You will then see two options:
- To use existing content, click the Use Existing button and then use the drop-down list to select the content that you want to use.
- To add new content, click the Create New button. You can then select from the following options:
- The options you have are as follows:
- Criteria Home Page: This Home Page displays a list of products based on a criteria that you can choose, for example Best Sellers, Newest In, Biggest Discounts or completely customised.
- Product Home Page: This Home Page displays a list of manually-selected products. This option allows more customisation than criteria Home Pages.
- Static Home Page: This is pure HTML Home Page where everything displayed is been created using HTML code, images and links.
Configuring Criteria Home Pages
When you click the Create New button, select ‘Criteria’. You will then see the following section:
Proceed as follows:
- On the Content Information tab, enter values for the following settings:
| Setting | Description |
|---|
| Home Page Content Details |
| Title |
Enter a title for the Home Page. This will appear on the Home Page selector tab. You can translate the title into any language in your system by clicking the Translate button to the right of the box. |
| Admin Name |
Enter a name for the Home Page that will be used to reference it within IRP Admin. |
| Criteria Type |
If you select one of the commonly-used preset (Best Sellers, Newest In or Biggest Discounts) then you don't need to select any further options and you can proceed to click the Insert Home Page Content button, uncache the system and click the Preview button, as described in further steps below. If you select 'Custom' then you can proceed to enter values for the remainder of the settings described below. |
| Criteria Specification |
| Max Products To Show |
Specify the maximum number of Models to show on the Home Page. This can be a minimum of 4 and a maximum of 51. |
| Must Have An Image |
Specify whether the Models in this Home Page have to have an image. |
| In Stock Only |
Specify whether the Models displayed in this Home Page must be In Stock. |
| Include Kits |
Specify whether to include Kits in this Home Page. Kits will not be included by default. |
| Sort Results By |
Specify how Models within this Home Page should be ordered. |
| Price Range |
Specify the Minimum Price of Models displayed in this Home Page. |
| Discount (%) |
Specify the Minimum Discount between RRP and MinPrice for Models within this Home Page. |
| Advanced Filters |
| Filter By Model Name |
If you click Yes, enter a value in the 'Model Name Contains' box and proceed. |
| Filter By Excluded Model IDs |
If you click Yes, enter a value in the 'Excluded Model IDs' box and proceed. |
| Filter By Gender |
If you click Yes, select a value from the 'Product Gender' drop-down list and proceed. |
| Filter By Year |
If you click Yes, enter a value in the 'Year' box and proceed. |
| Filter By Season |
If you click Yes, select a value from the 'Season' drop-down list and proceed. |
| Filter By Ordered Within Last |
If you click Yes, enter a value in the 'Ordered Within Last Days' box and proceed. |
| Filtered By Offer Type |
If you click Yes, check the relevant 'Offer Type' boxes and proceed. |
- Click the Insert Home Page Content button to save your configuration.
- Click the Brand and Category Restrictions tab.
- Use the boxes in the 'Brand Restrictions' and 'Category Restrictions' sections to define the brands and categories that are included or excluded from displaying on the Home Page.
- Click the Update Home Page Content button to save your configuration.
- Uncache the system and click the Preview button to see what the Home Page looks like on the front end of your website.
Configuring Product Home Pages
When you click the Create New button, select ‘Product’. You will then see the following section:
Proceed as follows:
- Enter values for the following settings:
| Setting | Description |
|---|
| Title |
Enter a title for the Home Page. This will appear on the Home Page selector tab. You can translate the title into any language in your system by clicking the Translate button to the right of the box. |
| Admin Name |
Enter a name for the Home Page that will be used to reference it within IRP Admin. |
- Click the Insert Home Page Content button to save your configuration. Other tabs will now appear: 'Add Models' and 'Selected Models'.
- Click the Add Models tab:
- Use the search filter to find models that you want to add to your Home Page.
- Check the box on the right side of the row belonging to the models that you want to add, then click the Add Selected Models button. You will then see these appear on the Selected Models tab (where you can remove any models again if necessary).
- Uncache the system and click the Preview button to see what the Home Page looks like on the front end of your website.
Configuring Static Home Pages
When you click the Create New button, select ‘Static’. You will then see the following section:
Proceed as follows:
- Enter values for the following settings:
| Setting | Description |
|---|
| Title |
Enter a title for the Home Page. This will appear on the Home Page selector tab. You can translate the title into any language in your system by clicking the Translate button to the right of the box. |
| Admin Name |
Enter a name for the Home Page that will be used to reference it within IRP Admin. |
| HTML Content |
This is where you create the HTML content to be displayed on the Home Page. Use either the rich text editor or the pure HTML editor (click the 'Source' button). You can also translate the content into any language in your system by selecting active languages from the drop-down list. |
- If necessary, you can include existing content by clicking the Upload Files button.
- If necessary, you can include Product Lists by clicking the Add Product List button. You will then be able to select any Custom Product Lists you have previously configured or create a new one.
- Click the Insert Home Page Content button to save your configuration.
- Uncache the system and click the Preview button to see what the Home Page looks like on the front end of your website.
https://www.irpcommerce.com/en/gb/IRPSupport/Home-Page-Manager/kb-10.aspx?HowTo=103#HowToGuide103
To edit a Home Page, proceed as follows:
- Go to Interface & Design > Home Page Content in the IRP Admin left navigation menu.
- Use the Search filter to find the Home Page that you want to edit.
- If you simply want to change the countries for which a Home Page is displayed, click the Edit button and use the Countries Where This Content Displays tab to add or remove countries.
- If you want to change one of the Home Pages against a country, either 1) click the Home Page in the relevant column in the main grid on the HomePageContent.aspx page, or 2) click the Edit button and use the 'cogwheel' on the Home Page tab and select one of the options:
Note that if you choose 'Remove Home Page From Group' you will be asked to confirm your decision:
Note also that once user-configured content has been added for an area it cannot be removed and must be swapped.
- To re-order the tabs, simply drag and drop the tabs to the position you want them to appear in.
To delete a Home page, click the Edit button followed by the Delete button. You will be asked to confirm your decision.
https://www.irpcommerce.com/en/gb/IRPSupport/Home-Page-Manager/kb-10.aspx?HowTo=106#HowToGuide106
Improving Website Page Speed
Page Speed and load time is a critical component to a websites conversion rate, the biggest impact on the websites page speed is the content on the page. For example the speed of your homepage will be highly dependent on the content and images you have placed on your homepage.
Overall
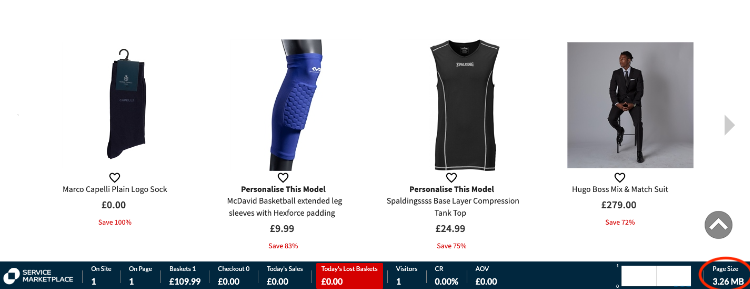
Homepage load should be kept below 4MB, ideally below 3MB but this will always be a balancing act of speed & load vs content. The best way to check your page size is by utilising the Tradeview overlay that displays when you are logged into your admin and browsing your site. The page size displays in the bottom right hand corner.
Things to consider:
You should consider what elements you want to include in your homepage, as you would with a physical storefront.
Homepages should be used to help guide users smoothly through your website, highlighting key categories/brands/products and minimising barriers to purchase.
Top Banners
Banner images should be under 150KB in file size, this is easier to achieve when banners are not set to full width.
Achieving the optimal file size can be done by restricting the image to the maximum dimensions of the banner.
Creating HTML banners rather than image based ones will help to reduce the size of the banners as text in images can bloat the file size significantly.
Videos and animated GIFs should be kept to a minimum but if required should be kept short with no audio to minimise the file size.
Full width banners images should be kept to a maximum width of 2000px, this will result in the image being stretched for screen sizes that are larger but will not be significant.
We recommended that the total number of active banners in any country should be limited to 3, any more and these banners may get ignored as users scroll down the homepage or navigate to category/brand/product pages before these are viewed.
How to check the size of your website banners:
1. For image banners the file size is listed in the main banners section of IRP admin
Images
All images should be created at the largest pixel size that they will be displayed, this will usually be the size when displayed on desktop, however there may be a breakpoint when they are displayed larger ie going from a 2 column layout to a 1 column layout, fortunately if you are just replacing an existing image, then you should be able to get the pixel sizing from it.
Where possible, similar to banners, any text should be set as an html overlay rather than in the image itself, this also helps with accessibility, as screen readers can read the text itself rather than rely on Alt Text.
All images should be optimised for web, this can be done using photoshop’s “Save for Web” option, this allows you to adjust the quality of the image to balance the file size vs quality. If you don’t have photoshop, tools like Kracken.io can bulk process images to optimise them for web.
Solid images (without transparent elements) should be saved as jpg (save for web - High - 60% will still result in good quality images at a good file size)
PNGs should only be used when transparency is needed.
loading=”lazy” can be implemented on images that are below the fold or in navigation, this allows the page to fully load quicker and then load when required.
Eg <img loading=”lazy src=”/images/imagename.jpg” />
Webp image format can be used however a well saved jpg can achieve a similar file size with a larger degree of browser compatibility.
Scrollers
Product scrollers are a great way to get products in front of customers as it reduces the number of clicks to get from landing on the site to purchasing.
Product scrollers should have a limited number of items in them, majority of sites have show 4 products per scroll so based on that we recommend that if you have:
1 Scroller - 20 max products in the list
2 Scrollers - 16 max products per list
3 Scrollers - 12 max products per list
If you want to have larger lists then you can add a “view more” button associated with an expanded list.
https://www.irpcommerce.com/en/gb/IRPSupport/Home-Page-Manager/kb-10.aspx?HowTo=451#HowToGuide451
